Helloee, I’m still here alive and kicking!

Well, how apt that this post, after such a long, long absence, follows the one entitled Country Cottage for sale, or something similar!! To bring you up-to-date, I sold my dream cottage in Norfolk, eventually, and moved across the UK to Wales. Six hours drive away.Yes, Wales. Where you get much more for your money, and much more rain. .

Well, what an adventure. I have had.  So, so much to write about, but no time to to put pen to paper, metaphorically speaking, of course. Too busy project managing all the work that has been done here over the last fifteen months or so. Too busy decorating,creating a garden from a concrete yard, horse managing, and hay making, etc., etc.

Whether you want to continue to follow the adventures of Alfie, Max, Minnie and me (with a little m) it is up to you, but I will now endeavour to bring you up-to-date with my adventures so far. (Swallows and Amazons eat your hearts out!!)

In August last year my animals and I moved, lock stock and barrel, from a sleepy village in Norfolk to a sleepy village in Wales.

Along the way we collected a friend from Italy, whom I shall refer to as S. I was sending her email links to various properties that would suit me and, having sent one that had a static caravan, I received an email back saying “ooh look there’s a caravan for me”. It came about that she wanted to return to UK after 35 years in Italy.

I spent the next six months marketing my cottage and searching Right Move, Prime Location, and various other country property websites to try to find a suitable property.

As S now wanted to join me I had to find a property with an annex, or outbuildings ripe for conversion for both of us and at least five acres and three stables for our two horses.

After an abortive dash to a property in Scotland that later was found to be in the middle of ‘Wind Farm City’ we , or should I say I, found a property on the borders of Carmarthenshire and Pembrokeshire that ticked more boxes than any of the others.

And so it came to pass that in August 2015 Alfie, Max, Minnie and me moved to HF Cottage. After 24 years in my Norfolk Cottage I wanted a challenge. I didn’t realise just what a challenge my new home would be. If you are of a strong constitution, read on to find out!

The New Home

The New Home

The pigsty

The pigsty


For sale – Country cottage with land in south Norfolk, NR16 1RZ

Lots has happened since my last post last year. Crikey, was it really last year?

Sitting on my backside with a broken ankle on a foot stool for six weeks gave me plenty of time to ruminate. After three horse-related accidents in as many months, which necessitated an ambulance on two occasions, I decided I didn’t want to ride out alone any longer. I didn’t want to live alone any longer either.

Solution: Move to a bigger property so that my dear friend, currently living in Italy, could move in with me with her horse and four cats. Our destination is Wales where, hopefully, we will be able to afford a property to house us all.

Consequently, my much-loved country idyll where I have lived happily for 23 years, is up for sale.

Charming bijoux, equestrian property nestling in the south Norfolk countryside situated 13 miles south of the fine city of Norwich and  8 miles from Diss, which has a direct rail line to London’s, Liverpool Street station (90 mins).  The cottage, believed to date from around 1886, is situated on the edge of a small village that has an excellent village shop, post office and butchers. The primary school is about half a mile away.

1.2 acres subject to survey with a further 3.8 acre (sts) meadow by separate negotiation.

£322,500

back elevation web

Accommodation comprises:

First floor
3 bedrooms;
Two fitted cupboards in one bedroom and a fitted cupboard on the landing;
Third bedroom is currently used as an office;
Toilet and wash basin;
Velux window on the landing

bedroom webpage

Ground floor
Dining room with a woodburning stove and oak flooring – stairs to first floor;
Lovely sunny, south west facing sitting room with French windows onto a paved terrace;
Kitchen with fitted units and breakfast bar and ceramic tiled floor;
Utility room with plumbing for a washing machine, vent for a tumble drier, large fitted cupboard and ceramic tiled floor;

bathroom web
Downstairs bathroom with vanity unit basin, bidet, low level toilet, bath with a power shower over, ceramic tiled floor and the hot water cylinder in linen cupboard.

Dining room web page

kitchen web

There is a substantial porch outside the kitchen door with cupboards to one side and boot rack/shelf to the other.

Elderberry Cottage front elevation web

All windows and doors are UPVC double glazed (except the porch window which is wood double glazed)  – all still well within their guarantee – and there are radiators in all the rooms. Oil fired central heating.

Outside

Boiler is housed in an outhouse adjacent to the cottage.
Plastic 1,000 litre oil tank.

Well maintained barn  (that had planning permission for an extension to the cottage, which has now lapsed) with electricity and tap;

Stables web
Two approx 11′ x 12′ wooden sectional stables with wide concrete apron in front, both with rubber matting and kickboards up to four feet – one has 4′ high stockboarding on all four walls and door;
Part brick and clay lump stable currently being used as a rug room and wood store;

FIL5513
Large feed room and garden store;
10×8 wooden garden shed;
10×8 Rhino greenhouse with toughened glass and
A 40mx20m drained manege. The post and rail paddocks are divided into two.
There is electricity to all the stables, feedroom and barn. The yard is concreted.
Large south west facing garden with mature shrubs, rose trellises/arches and a veg patch.

FIL4179

The property is not seen from the lane and is approached by a long drive.

Drive web

A secure 3.8 (sts) acre amenity meadow, fenced, part post and rail, with water and a solid, double field shelter, is available by separate negotiation. This is situated a short walk from the property and is not on a road but along a RUPP (road used as a public pathway) which allows for vehicular access. It is a lovely, free-draining, peaceful field, divided into two by post and rail fencing and surrounded on two sides by arable fields and has mature trees and hedges around its boundary. The RUPP  finishes just past the field and continues as a footpath outside two sides of the of the field boundary.


Oh dearie me, too much speed ?

Since yesterday, I am on full stable duties, thus giving Nicky more time to take Max up to the meadow. Yesterday was hard work as it was ‘wet day’, that is the day that Nicky takes all his wet shavings out of his stable. I helped by removing all the dry stuff and banking it up around the edge of the stable, leaving just a big patch of wet for Nicky to cart off to the muck heap.

Proves just how soft my hands have become over the last five weeks, as, after moving all those shavings, I had the start of blisters on my hands!

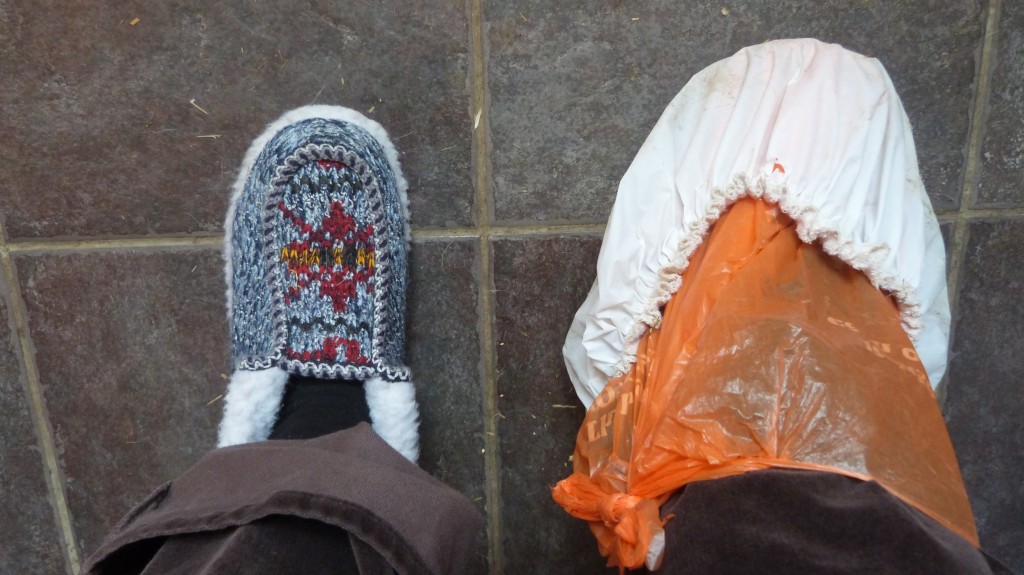
Was up bright and early to give Max his breakfast before Nicky  arrived, so she could just change his rugs and take him up to his field. I mix his feed with water in the kitchen in the morning and then hook the bucket onto my crutch, and with difficulty as I am lopsided, hobble out to the stable. Yesterday, chucking around all of those shavings I found that my shower cap, over my orthopaedic boot wasn’t protection enough, so I tied a carrier bag over my boot first, then slipped on the shower cap. Felt quite chuffed with this arrangement, safe in the knowledge that I would keep the boot clean! It wasn’t until I had negotiated the stepping stones on the gravel outside my backdoor, then hopped across the yard, through the gate to Max’s stable – until I took the bucket off my left crutch, in order to open the stable door – that I could see my left foot. Oh dearie me, I still had my slipper on! Oh, how silly. Then had to hop back indoors to change into my wellie.

Fancy going outside with my slipper on!

Fancy going outside with my slipper on!

Mucking out, scrubbing manger, feed bucket and water bucket, sweeping up outside the stable, filling the hens’ hopper, was quite enough in one go for my unfit body, so decided to just fill the birdseed feeders and come in for breakfast.

I used to fill the bird feeders up every day or so. Today was the first time I had filled them for over a week. Oh, where have all my birds gone? Only seem to see great tits, a robin and the odd greenfinch on the feeder nearest the window, these days. Have they all disappeared to another garden in the village, that has a more plentiful supply? Are more people feeding them, so they are spread more thinly among the gardens? Or are there fewer birds? I do so hope it’s not the latter.

It’s a beautiful day and the sun is streaming in through the French windows. Only trouble is, that it shows up all the dust (and the dirty windows). After breakfast, before I sat down and put my foot up, I decided I would do some dusting with my super duper anti static wand thingey. Was a bit gung ho pushing it around behind a china candlestick, but, at the same time, being careful not to hit a rather precious blue and white meat charger hanging on the wall. As soon as I touched it, I knew that, with my reduced mobility, I wouldn’t be able to nip around and catch it, and it was destined to hit the floor, with a disasterous result.

P1010224

Oh dear, now that was really silly. Thinking that I ought to quit while I was ahead, I decided to sit down, put my foot up, and check my emails. Seems to me, a far safer occupation in my present frame of mind! Ho hum, these things happen, never mind, like Humpty Dumpty, I can stick it back together again!


A day of firsts!

Yesterday was a wonderful day, definitely a big step forward (not hop!).

I had my first bath since I broke my ankle, it was glorious! Only thing that spoiled it was my lack of a bath pillow, which is essential with my bath.

When installing the new bathroom suite 12 or so years ago, I made the mistake of not trying the bath out in the showroom. If you replace your bathroom, I can’t emphasis enough that you should shake of your shoes and get into the bath! I didn’t and it was a big mistake! Why, you may ask?

Well, my bath is great if you’re tall, but for little ol’ me it’s so uncomfortable. I can’t sit up because I can’t brace my feet at the end under the taps. To do this, I have to lie on my neck! It is longer because the back is very upright, and not sloping like the old one. This makes it uncomfortable as I can’t sit up properly because my legs aren’t long enough!

However, with a blow up bath pillow strategically placed, I can lie comfortably for a long soak. I do have a brand, spanking new, bath pillow all ready to inflate last night when I decided to take a bath rather than a shower. So, with the water in the bath, I took the pillow out of its bag. The mouthpiece together with stopper are barely half an inch long,  and although I huffed and I puffed I couldn’t blow the damn thing up! Ridiculous! I feel an angry email coming on to the company who sold it to me!

So, sadly I couldn’t lie back and relax, but I did wallow around like a hippo in mud having the time of my life. What joy to have a lovely soak!

My second first was a lovely cuppa out of a china mug. What joy, again, no nasty plastic taste!

The last first was supper on a plate! Wonderful. For the last few weeks I have had to eat my food out of a plastic, lidded box, as this was the only way I could transport it, in my bag, to the dining or sitting room. I could eat off a plate because I used just one crutch, on my bad ankle side, leaving the other hand free to carry cup or plate. Great progress, but I don’t know whether I should, yet, be using just one crutch, but it was only for a short walk.

Facing up to one’s limitations

Reading Slummy Single Mummy’s latest blog post: What do you do when you are just not very good at something? started me thinking about what I’m not very good at. Of course, there are lots of things. Usually I will work hard at practicing what I’m not good at, to try to improve, as anybody would, but practicing one particular thing, doesn’t make the slightest bit of difference.

Until little Alfie came into my life, I had forgotten all about it. Now, he loves nothing better than playing ball, though as I have said before, he doesn’t like giving it back to me ! However, when he does give it up, he looks expectantly at me to throw it again for him. This is where the problem arises. Sorry Alfie, I just can’t throw balls. Not into the far distance. Nor in the direction I choose. No wonder I was never in the rounders team at school!

Think I must have weak wrists or something, because the balls go a pathetically short distance, or up on the stable roof, or into the nettles. Not that it has worried me until now. Alfie looks oh, so disappointed that he doesn’t have to go far to retrieve it, or he can’t retrieve in because I have thrown it, strangely he thinks, into the beech hedge!

I’ll just have to accept it. I can’t throw balls. I can’t make stones skim across the top of water either (weak wrists again?), which is something I have always wanted to do! Ho hum.

Will just have to concentrate on the things I can do. Like making chutney, for example. Yes, you’ve guessed, I have made another batch! This time it’s spicey brown tomato chutney and although I say it myself, it’s very yummy. I just can’t let all those tomatoes I’ve grown this summer, go to waste, now can?

Spicey brown tomato chutney

1lb (450 g) chopped red tomatoes
1lb (425g) peeled, cored and chopped cooking apples
1lb (450g) peeled and chopped onions
8 oz (225g) brown sugar
8 oz (225g) chopped cooking dates
1 (560 ml) pint malt vinegar
Grated rind of two oranges
3 crushed garlic cloves
1 tsp ground cinnamon
1 tsp ground cloves
1/2 tsp cayenne pepper
Salt and pepper to taste

Easy peasey, chop it all up and mix it up in your pan, following the instructions in my Red tomato chutney post. Makes 4 good-sized jars.

More little gifts for kind people

More little gifts for kind people


It’s all go in the kitchen!

Eager to use up some of my surfeit of tomatoes, I checked my cookery books for another chutney recipe and came up with one I hadn’t made before, but I needed some courgettes. This was my incentive to get out into the garden to check my veg plot.

Not wanting to have to clean out mud from the many grooves on the bottom of my boot, I came up with the idea of putting a shower cap over it. This worked admirably, so I set off down the garden with a spring in my step (tee hee ee). Luckily, I discovered some courgettes hiding under their leaves, so I had all the ingredients needed for this new recipe.

Tomato and courgette chutney
4lbs (1.75 kgs) of ripe, chopped, tomatoes
2 lbs (900g) courgettes, thinly peeled and roughly chopped
1lb (450g) chopped onions
8 oz (225g) no-need-to-soak, dried apricots, chopped
1 tsp (5ml) ground coriander
1 tsp (5ml) ground ginger
1/4 tsp (1.25ml) cayenne pepper
3/4 pt (420ml) vinegar (I used malt vinegar)
12 oz (350g) brown sugar
Salt and pepper to taste (you’ll need more than you think)

Follow the instructions for my red tomato recipe which is, basically, chop everything and chuck it all in together, couldn’t be easier!  I found that after it had simmered, covered, for an hour I had to simmer it (uncovered) for a further 45 minutes to reduce the liquid. I couldn’t recommend this recipe more highly, it is scrumptious and it makes lots and lots!

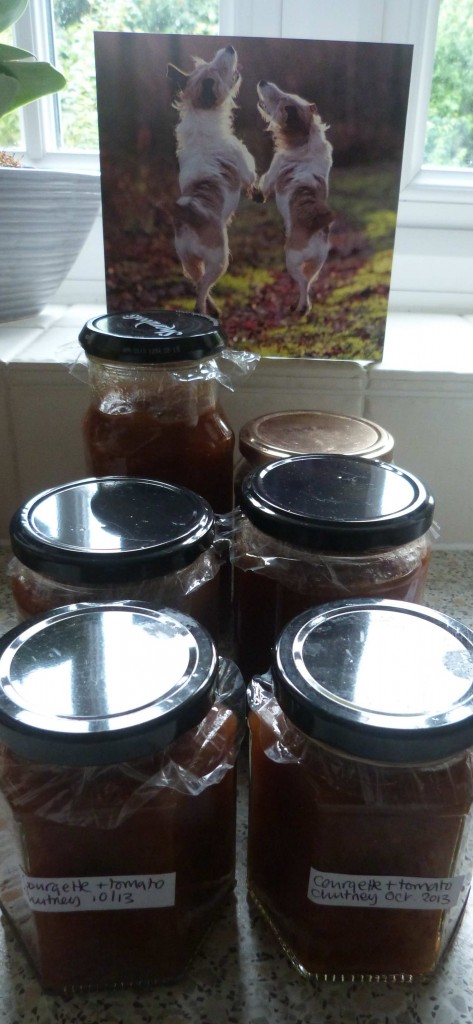
Tomato and courgette chutney

Lots, and lots, that’s 8 and a half jars. As you can see, I’ve already started to gift them to my lovely helpers. In the background is a wonderful card of two frolicking Jack Russells sent to me by Liz. Thanks Liz what a joyous photo. Wish I’d taken it!

I am finding all these home preserves are great ‘thank you’ presents! Marion, my next door neighbour was the first to receive a jar in thanks for taking me to the post office and to my local horsefeed/tack shop yesterday. Was running low on one of Max’s foods (his coarse mix) and food for young Alfie. She does her ‘own mix’ dog food (two types) as well as hacking mix, which Max looks really well on. Both are much cheaper than proprietary brands, which is great for my pensioner’s pocket!

Hope the little fella enjoys his new biscuits more than his current ones. If he doesn’t, then Nicky has given me a great tip that has him wolfing them down, like he used to with the tinned food. I just take a scraping off the top of Minnie’s cat food tin; mix it with some warm water then mix in his biscuits. I don’t know whether it’s the smidgin of cat food, or the warm water, but he wolfs down his biscuits in one go. Marvellous!

I still have lots of green tomatoes, ripening slowly in a plastic bag, together with one ripe one. I have another excellent recipe, this time for green tomatoes, which I’ll use with the green tomatoes that don’t want to turn. More about that later.

Some time ago, before I broke my ankle, I made some blackberry surprise cupcakes to take to a MacMillan coffee morning at Orchard Toys where I used to work. When shopping for ingredients, I took advantage of a ‘buy one, get one free’ offer on butter. So, as I had a spare pat of butter in the fridge, I decided, against my better judgement, to bake a cake.

As it was getting late last night when I got started, I decided that a Victoria sponge would be the quickest. Abandoning my cookery books for once, I did an internet trawl. On reading Mary Berry’s recipe on the BBC website, I just had to go for it.

I can remember cooking a Victoria sandwich in my cookery class at school, 50 years ago. I can remember our domestic science teacher (whose name I can’t remember, but whose face I can see as if it was yesterday) telling us to change from a wooden spoon to a metal one when folding in the flour. Changing over spoons was to remind us that we weren’t beating any longer. We had to gently, very gently, mix in the flour.

What did I like about Mary Berry’s recipe? Well, strangely enough, you just dump all the ingredients in the bowl at the same time, and set to with your electric whisk! No need to gently fold the flour in ! Just whisk away! It was marvellous, so much quicker. Think of all those hours of my life I have lost, hand beating sugar and butter, then slowly adding the eggs, one at a time while continuing to beat. Phew, what a lot of labour!

I was intrigued to know how it would turn out. Needless to say, nom nom, that it’s brilliant. If you can make such a lovely, moist, cake that way, then why did they say, for all those years, that we had to fold in the flour. Wotta lotta tosh!

Mary Berry Victoria sponge

Am really happy that I can now offer my kind visitors coffee or tea and cake. That is if I don’t scoff it all first. No, Alfie you’re not going to get any!

Making chutney on crutches

Sunday, the day started badly. Before I tackled my next challenge, I decided to take my breakfast tea into the sitting room  to catch up with the news on the radio. As I had been doing for the last week, I had made my tea in my lidded, plastic, container. For some reason, I didn’t check thoroughly enough that both lids (pouring hole too) were closed tightly. After a couple of tentative crutch-steps, I felt a hot feeling around my crotch. Yes, you guessed, the container had tipped onto its side and the hot tea was emptying out into my cotton bag!  Eeeek!

I managed to untangle myself from the bag and put it on the counter where it spewed out all the liquid, flooding the work top. I needed to react quickly, but this is really difficult when you’re on crutches!

As you quickly learn, wet tiles can be lethal if you’re on crutches because, despite the rubber stoppers on the bottom of them, they can skid from under you. So I dumped the bag in the washing up bowl, grabbed a tea towel to mop up the work surface and a towel for the floor. Then the bag and towels had to join the other sundries in the washing machine to be washed. Would be lost without my little peg bag, which was invaluable to transport necessities backwards and forwards from kitchen to sitting room and back.

(This morning it came to me, out of the  blue, that if the bag around my neck was hanging at an angle with one bottom corner pointing down to the ground then any container would sit happily in the corner, leaning against the angled side rather than tipping over onto the bottom of the bag if the bag was hung around my neck straight.)

After all of that excitement, I had to get on with the chutney. So, as I didn’t want to perch on one leg while I was chopping tomatoes, apples and onions I transported, chopping board, breadknife and everything except for the onions in a variety of plastic bags to the dining room table. Bit paranoid about carrying my French cook’s knife in my little bag, while on crutches, so chopped up the onions in the kitchen.

Red tomato chutney

2 lbs (900g) red tomatoes, chopped
1 lb (450g) cooking apples, peeled, cored and chopped
1 lb  (450g) onions chopped
8 oz  (225g) brown sugar
8 oz (225g) sultanas
1/2 pint (280ml) vinegar
1 tsp (5ml) mustard powder
2 tsps (10ml) ground coriander
1 tsp (5ml) ground ginger
1 red chilli seeded and chopped (or 1 tsp chilli flakes)
Salt and pepper

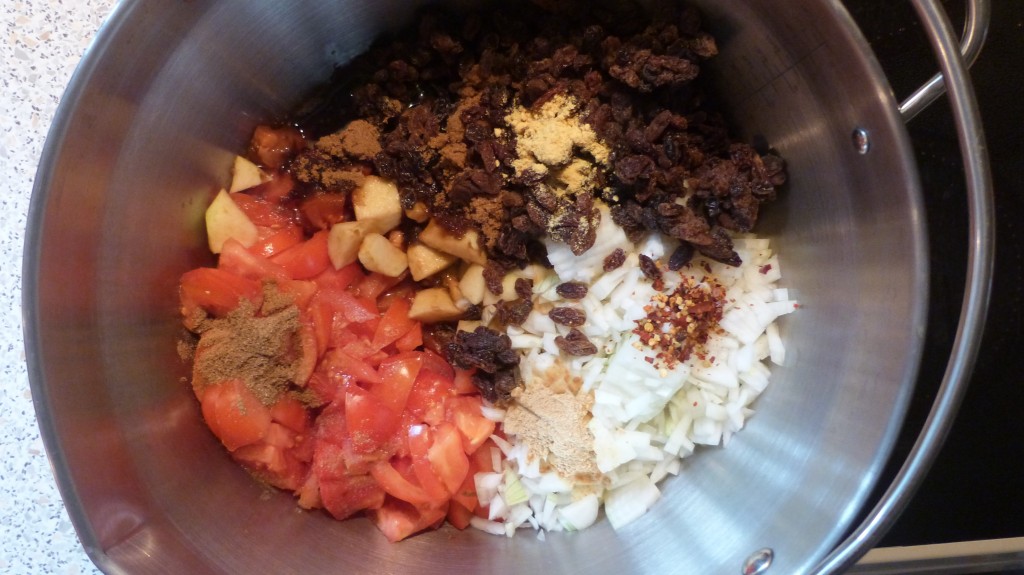
Mix the tomatoes, apples, sultanas and onions in a large saucepan. Stir in all the remaining ingredients, adding a generous sprinkling of salt and pepper.

Mix all the ingredients in a preserving

Bring slowly to the boil then reduce the heat.

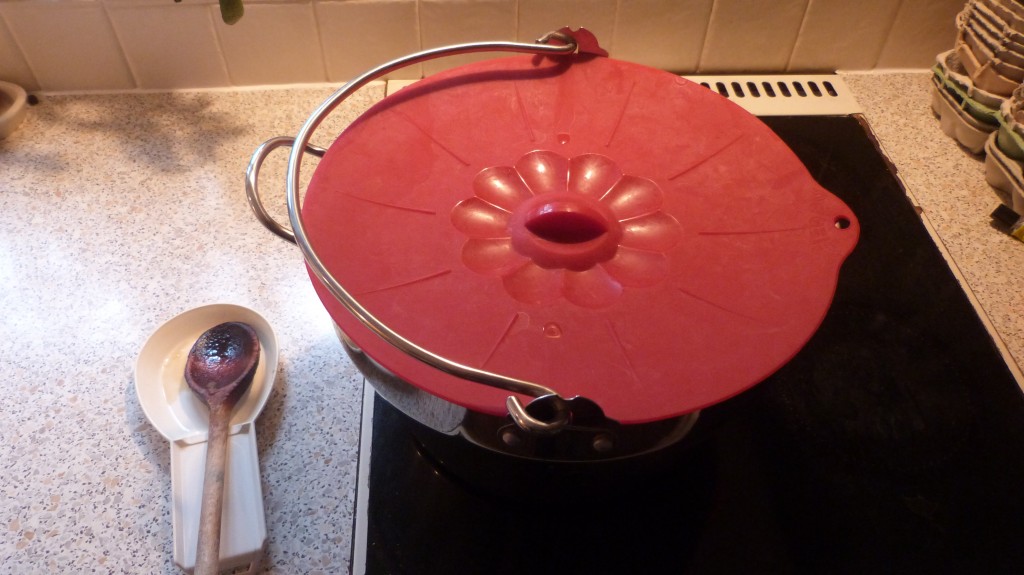
Turn down the heat and cover the pan

Turn down the heat and cover the pan

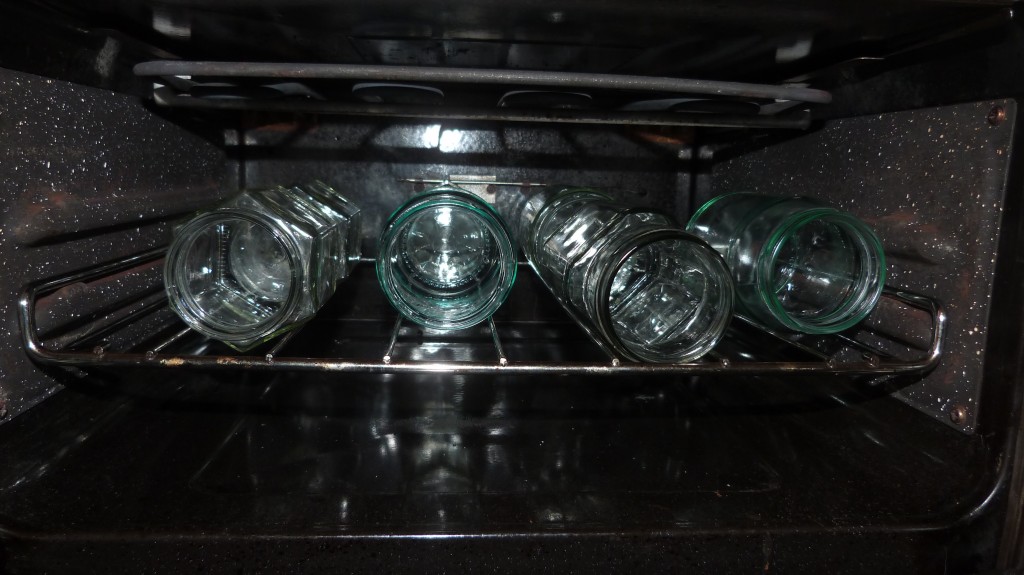
Simmer gently, stirring occasionally, for an hour and a half, or until thickened. Sterilize your jam jars in the oven.

Sterilize your jars in a warm ovenYou will need  a ladle, funnel, waxed discs, cellophane covers, elastic bands and labels.

P1010157


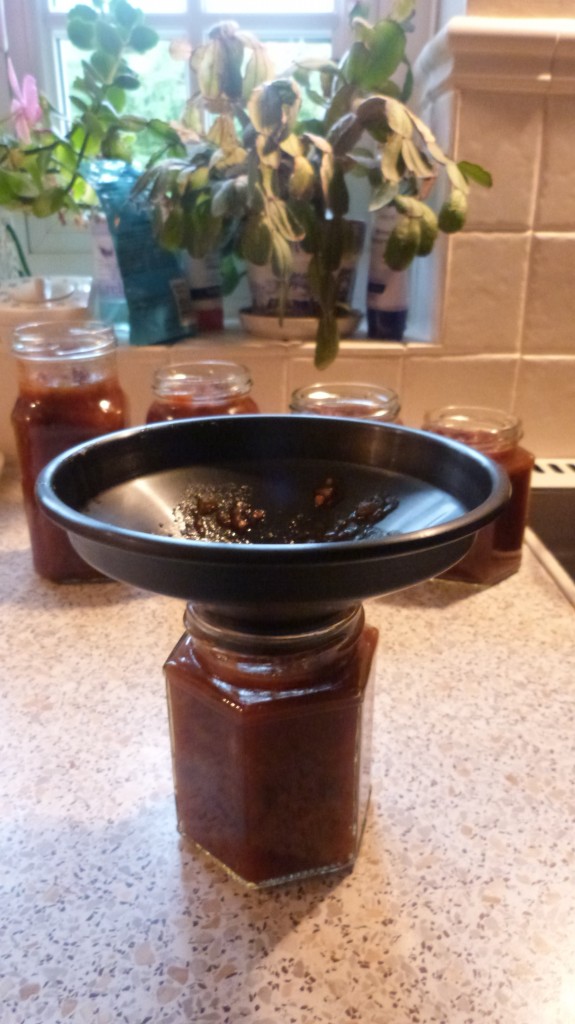
When you start potting up, it really makes life much easier if you have a jam/chutney funnel, otherwise it can become very messy, which I initially found out to my cost!

A funnel makes filling the jars far less messy


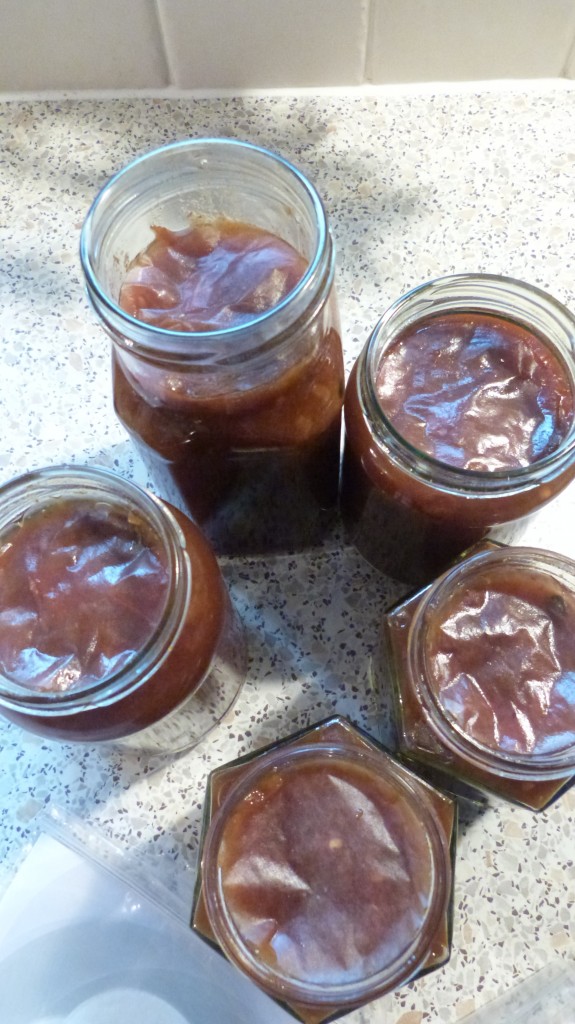
Once potted up, place the coated side of a little disc on the top of the chutney, pushing out any air bubbles to ensure 100% contact with the chutney.

Ensure that the waxed discs have no air bubbles under them

Ensure that the waxed discs have no air bubbles under them

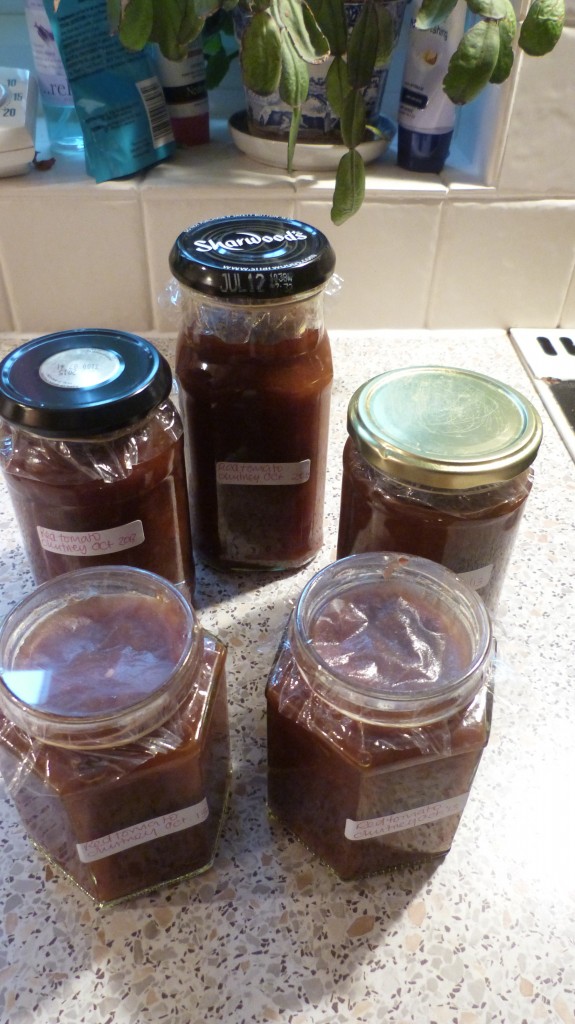
While the chutney is still hot, moisten one side of a cellophane disc and secure it, wet side down, on the top of the jar with an elastic band. The heat rising from the chutney will dry the cellophane and it will tighten across the top of the jar.

P1010163

Finish off by securing with the jar’s metal lid. The lid helps to stop the chutney drying out, thus extending its shelf life. If you  don’t have a metal lid to fit, cover with a double topping of baking parchment or greaseproof paper. Covered in this way, the chutney top will dry out more quickly than when covered with a metal lid. But I’m talking about after being on the shelf for longer than 6 months. Hopefully your chutney will be eaten up long before that!

Phew, that was quite a challenge, but I felt so much better having done something constructive rather than sitting around all day with my leg up, eating chocolates!

Later on I left the house for the first time for over a week as I was invited over to supper with some friends, who came to pick me up. I had a really lovely evening, great food and great company and even a little tipple!

When dropped off, I hopped over to see Max in his stable for the first time in nine days, with a pocketful of minty goodies. Did he whinny  to welcome me? Softly nicker into my ear? No, he totally ignored me and was more interested in nuzzling my friend’s face! It was quite obvious he was paying me back for not going out to give him his ‘goodnight carrots’ for over a week. What a snub. Little monkey.

Next challenge? Changing the bed!


Battling with modern technology

I have come to the conclusion, all things considered, that I prefer living alone. Except, that is, for one thing. Instruction manuals.

Whether for my Dyson, washing machine, tumble drier, lawnmower, TV or Nikon camera, I am really phased when it comes to reading the instruction booklets. I can’t get passed the basic instructions before my eyes start to glaze over and I start to think what I want for tea. In the past, I would pass them to my ex asking him to read them and to give me a precis of what I needed to do.

But he is no longer here, so I need to cope with it by myself. A month or so back I took delivery of a super duper backpack sprayer which has an inbuilt battery and a little trolley on which to pull it. Great, I thought, not relishing the thought of lugging around 15 litres of weedkiller, not to mention the weight of the plastic carrier and inbuilt battery, on  my back!

It said that it came charged, but I thought I had better check. Read the instructions, up to the point where it said ‘charging the battery’. Didn’t read any further, of course, no need. Found all the correct holes to push leads into and, hey presto, a constant green light lit up, which the instruction booklet said meant that the battery was charged.

Okay, so I put some water in it. Needed to check that all the seals were tight and there were no leakages… Now to turn it on. Oer, nothing but a high pitched whining noise. Quickly turned it off. Perhaps I needed to turn the pressure knob up? Tried that, still no joy. After checking the ‘trouble shooting’ section in the instruction booklet, I discovered that the high pitched noise was indicating that the battery wasn’t charged. ( I could have seen that, if I had taken the trouble to look at the battery level dial – ho hum.) Oh, buggerations, I thought just my luck to have a faulty battery charger.

I had resigned myself to phoning the ebay supplier the next day when I heard my neighbour in his shed next door. Er, Andy, I said, do you think you could help me? He too, at first, was puzzled by the constant green light when we put the battery on charge. That is… er…. until he .. er.. read further into the instructions. At some point further on it said, “sometimes the charger will show a constant green light when it is on standby” (i.e. not charging). Say no more!

Last year, another neighbour, another Andy, funnily enough, promised to cut my beech/hornbeam hedge for me each year if I would lend him my cutter for his hedges. I was thrilled because my only means of cutting my hedges was with the hedgecutter attachment on my strimmer. The petrol strimmer, with this attachment on the end of its long arm, is very heavy and beyond my powers to use for more than 5 minutes at a time. So I readily accepted his offer.

(Starting the strimmer also seems to be beyond my powers at the moment. Twice this week I have been all set to strim off the paddock as it has been two weeks since the buttercups had been sprayed. But could I get it started? Nope.)

Anyway, not liking to be beholden to people, the independent creature that I am, I decided to buy a battery operated hedge cutter so I could cut my hedges when I wanted. After humming and haaing over two, I settled for the Bosch.

It arrived yesterday, and late last night I started to read the instructions. Er, not a good time to attempt to read instructions!  Looked at the diagram and learned what everything was and where it all was. Now, how do I charge the battery? Read the instructions and it said ‘press the battery unlocking button to remove the battery’. Eh? Went back to the little diagram. No, I wasn’t imagining things… no ‘battery unlocking button’ was shown on the diagram. How could they miss that off ? Mmm, I thought, why don’t they get a woman to write the instructions? Then, and only then, we might be able to understand them!

After a good night’s sleep I picked up the instructions again. They were no further help than they had been the night before. So I had to guess that the red button above the battery was what was needed to remove it. Wrestling with the cutter on the floor for several minutes I managed to, finally, unlock the battery and put it on charge. Hurrah, I thought, another battle won!

Next job this morning was to do some washing, as I see that insertions on Ebay this weekend are foc. Want to clear out office clothes from my wardrobe and this is a good weekend to sell them.

What’s that on the washing machine? A red light that I haven’t seen before? It’s not clean filter or empty water tray (it’s a condenser drier). Er, clean condenser? What’s that? That’s new. Now, where is the instruction manual? Oh, clean condenser every month? I didn’t know that. Only had the drier 18 months. What’s that? Failure to do so could result in a malfunction. Oh dear.

Another five minutes wrestling with the drier this time. It’s in a corner, up against a cupboard, so there is a finite angle it has to be in, in order to pull out the long condenser drawer. I won’t go into details here about the amount of gunge there was in it and how it blocked up the bath plughole.

Lesson is to read instructions from beginning to end, and then again. I wonder if I will next time?


Goodbye glory hole

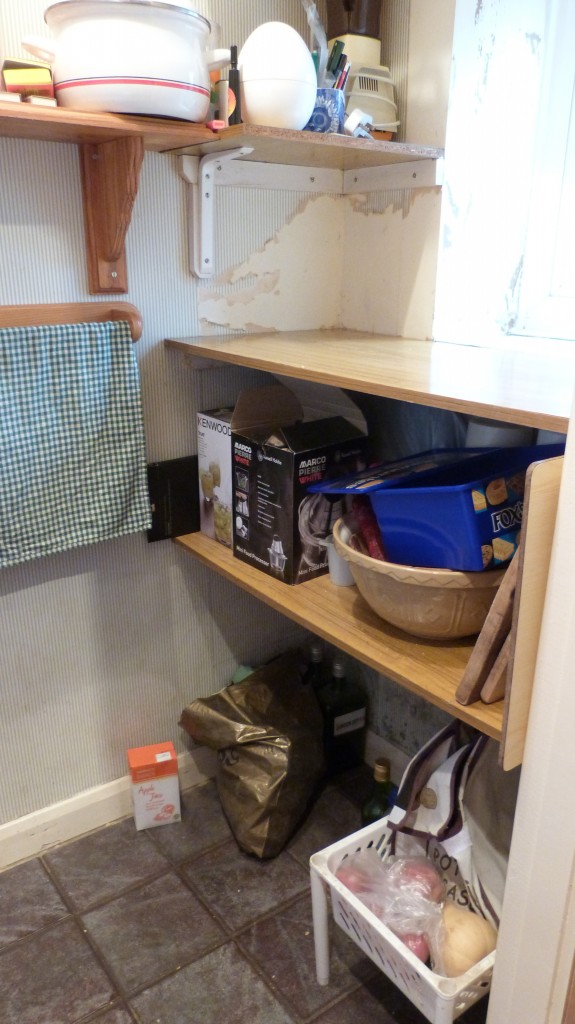
When I was decorating the kitchen last year I had fully intended doing the pantry too, but when push came to shove, I didn’t. I’d had such a fight to get the wallpaper off in the kitchen (that I had pasted up 15 years before), I couldn’t face the same again in the pantry. Nor could I face finding homes for all the stuff that was in there.

Back in March I bit the bullet and started stripping wallpaper. Only a tiny space, but a pain to do.

Pantry during decoration

The contiboard shelves had to be 25+ years old and definitely needed to be replaced. Pine I thought, would be fine. I could paint them with some of that Cuprinol wood wash, in an ash colour. That would sort of fit in with the limed oak effect in the kitchen proper.

As I was driving to B & Q one Wednesday evening to take advantage of their 10% discount day for oaps to purchase said wood, I started to think that it would look quite nice if I could resource a double base unit like those in the kitchen. So my trip to Norwich to save 10% on just some sandpaper and varnish was a bit of a waste of time!

I scoured ebay and found similar kitchens, in Manchester, the south west and Essex. Mmm, Essex isn’t far, I thought. But it was a whole kitchen and was sure they wouldn’t want to let me have just one double base unit. Back to the drawing board.  Then I remembered John, the carpenter, who lived in the village. I know he’d made whole kitchens for various other village folk. Perhaps I could get a quote from him to replace the shelves and build a front, to make a cupboard?

To cut a long story short, he came over and said that yes, of course he could do that for me. So we agreed a price. He was to make a cupboard across the alcove, in oak (that he had) with two shelves, and I was to lime wax it.

It took a bit of time to arrive, and when it did it was a piece of furniture ! He had made a proper cupboard with sides, top and shelves. Only thing missing was the back. It looked brilliant and, thankfully, slotted in fine, despite the wonky cottage walls! He also replaced the shelves above the cupboard and along the back pantry wall, and over the fridge.

I spent a happy morning roughing up the grain with wire wool and applying lime wax.  I think it looks great. I wonder what you think?

P1000993